Best Bike Light Assembly Service In NM City
Mobile Auto Truck Repair NM City
Bike Light Assembly Service near NM City: Are you looking for the BestBike Light Assembly Service near NM City ? Mobile Auto Truck Repair NM City, it comes to choosing the right bike lights, your visibility on the road is essential, but durability, size, ease of fitting and removing, and battery replacement. Cost? Free estimates! Send us a message or call us today. Best Bike Light Assembly Service around NM City. We serve NM Cityand other areas. Get a Free Quote Now!
BEST BIKE LIGHT ASSEMBLY SERVICE IN ALBUQUERQUE NM IA
ALBUQUERQUE NMBIKE LIGHT ASSEMBLY
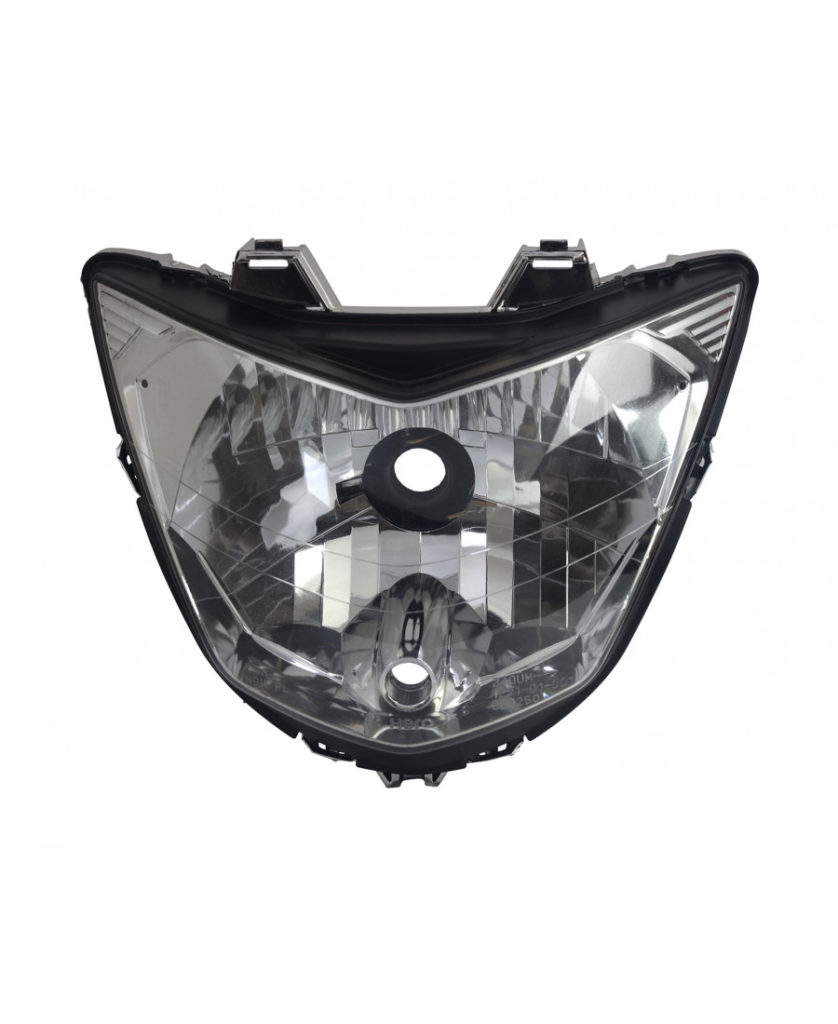
Bike Light Assembly
Bike Light Assembly Service near NM City: Bicycling is a convenient, healthy, environmentally friendly and fun way to get around Mobile Auto Truck Repair NM City. Whether you’re a lifelong cycling commuter, a weekend recreational rider, or have never been on a bike in your life but are excited to get out there, there are important tips to be aware before you ride. These web pages provide information on how to get a bike, how to ride safely, how to prevent bike theft and more!
How to Install a Assemble Bike Light
If you plan to use your bicycle at night, a good bike light is an absolute necessity. There are many locations in which bike lights are required by the law. Nonetheless, you may be unsure of how exactly to install a new bike light when you purchase one. If this is the case, what follows should give you everything you need to know.
Step 1 – Deciding on Placement
First, you should decide where you are going to put your new bike light. Ideally, you should have a bike light for both the front and back of your bicycle to maximize your visibility while driving at night. If you have a bike light installed in only one of these locations, opt to add another light.
In addition to deciding whether to attach your new bike light to the front or back of your bicycle, you will have to decide the exact location to attach your bike light to. Part of this will depend on the exact model of bike light you buy. Some will be designed to clip to a particular location, while others will be more generic. However, if you are attaching your bike light to the front of your bicycle, the center of the handlebars is a great place to do it. There are many reasons to opt to place it lower. For example, the space may already be taken up by a reflector. On the rear of the bicycle your options are more limited; you have almost no choices but to attach it directly below the seat.
Step 2 – Installing Batteries
More likely than not, your new bike light will come with a button cell type battery already installed and ready to go. However, this may not be the case. If so, get out your screwdriver and remove the screws holding the battery case shut. Chances are, you will see a space for a button cell battery, which you should insert. Nonetheless, other types are also possible. Use your screwdriver to replace the cover and continue.
Step 3 – Attaching
Exactly how you attach your bike light will vary, based on your individual model. Most will involve tightening a clip until it fits snugly. Clip the bike light onto its new location and snap the clip shut. Next, tighten whatever mechanism controls the clip.
Step 4 – Adjusting
Most bike lights will allow you to adjust them up and down to make them more visible and useful in lighting your path. You should take a minute to turn on your light and adjust the direction it points. Otherwise, you may find that your bike light does not actually illuminate anything for you the next time you use your bike at night.
A Guide to Lights on Your Bike – How to See and Be Seen
Bike Light Assembly Service near NM City: Statistically speaking, between 40-60 percent of injuries and fatalities from bicycle/vehicle collisions occur during the hours of darkness.
This is due to two factors. First, during the evening and overnight hours, a significantly greater portion of both cyclists and drivers are intoxicated than you’d find during the day. The second factor (and the one that we’re going to address with this article) is the difficulty that motorists have in seeing cyclists.
I suppose you could promise yourself that you’ll only ride during daylight hours. But the fact is, for many bike commuters, riding in darkness is a fact of life, particularly during the winter when the daylight hours are so much shorter. Plus, you’d also miss out on a lot of fun riding opportunities, including a number of crazy and fun bike events. So, we’re going to look at how you can light yourself up effectively — in a way that is both effective in terms of increasing your visibility to motorists and at the same time going fairly easy on your pocketbook.
Front Light on Your Handlebar
A basic item that you really need to have if you are riding in darkness. is a handlebar-mounted headlight. In most cases, these are intended simply to make you more visible to others, as opposed to illuminating your path. Having a strobe option (like many lights do) is always a nice idea since I’m convinced that a flashing light is more noticeable to drivers than a solid beam. Plus it’s easier on batteries and doesn’t get lost in the glare of other headlights. Additionally, for simplicity in your life, consider getting a headlight paired with a dynamo that provides it with juice. With one of those, you never have to worry about batteries since the light is powered solely by your bike’s motion.
Things to consider in assessing headlights:
- What type of battery does it use?
- Are the batteries rechargeable?
- How many hours of run time does the light have before draining the batteries?
Halogen and LED bulbs are both good choices for delivering strong, bright light. Expect to pay $25 and up for lights that allow you to be seen by drivers; more ($100+) for stronger lights to help you see, i.e., strong illumination for your path as you go down the road. The NiteRider MiNewt Pro 750 is a good example of this type of light.
Front Light on Your Helmet
For additional visibility, a real plus is to wear a helmet-mounted light. These are good since on your head they sit up higher, lifted up above much of the automobile traffic, making it less likely to get lost in the stream of car headlights. Plus, since a helmet-mounted light points in the direction that you look, it’s effective at grabbing drivers’ attention with the bright beam pointing directly at them as you approach.
Rear Light on Your Bike
By law, riding after dark not only do you need a white light on the front, but you also need a rear red light on your bike as well. Though most lights have a solid red setting, I prefer a blinking red light as a more effective way to make yourself visible as people approach from behind. Depending on how your bike is set up, you can mount the red light on a fender, on your seat post or on your rack or trunk bag. Most tail lights run on either one or two AA batteries, and last for several hundred hours.
Like a front white light mounted on your helmet, attaching a red blinking light to the back is another good idea. It’s an easy way to keep you safer, and the lights generally clip on to the helmet pretty easily. The light is lifted up higher, again making you more visible to motorists. If you can’t find a way to clip the light on your helmet, attaching it to the collar of your jacket or on a backpack or messenger bag will achieve the same result.
Reflective Vest or Jacket
As a bonus tip, beyond just lights, if you really want to be seen, you want to get yourself the brightest colored reflective vest or jacket you can find. Though it may feel just a touch dorky the first time you wear it, your goal is to be as visible to motorists as possible. A bonus is that when you’re not riding, you can also wear these vests to direct traffic, go deer hunting or just pick up trash alongside the road.
When you combine that with a reflective strap worn around your ankle or calf, you’re really jamming. The strap is designed to pick up lights from headlights, and the fact that it’s moving up and down when you pedal makes it that much more visible to others.
TIPS
Batteries
Bike Light Assembly Service near NM City:The days of disposable battery bike lights are now nearly gone….there are a few cheap versions still available but they’re really not worth it. The one exception to this is the tiny blinky lights that can be used as a back-up to your main system. These lights run on watch-type batteries (CR2032 are the most common size), and they can run for many hundreds of hours with acceptable levels of light for such tiny units.
Front lights
Front lights need to be chosen carefully and take into account the sort of night time riding you’re going to be doing. If you’re only going to ride in urban areas, your main consideration is to ‘be seen’ by other road users. If you’re going to be riding on unlit roads and paths then you will want a light that will help you to ‘see’ you’ll want a unit that is bright enough to show the potholes on the roads before your wheel disappears into one. You’ll also want to see corners before you reach them!
Rear bicycle lights
However, there have been a few technological developments starting to arrive which are interesting.
- Some dynamo rear lights can sense when you’re braking and increase the brightness of the light accordingly. This, like a lot of ‘improvements’ is more likely to make the rider ‘feel’ safer than actually make much difference to the actions of the car behind. But ultimately, anything that draws the eye of another road user should be seen as a positive. Dynamo and dynamo-derived rear lamps invariably conform with German regulations, so they tick the legal approval box and incorporate the retro-reflector you also need by law. But German regulations don’t allow flashing, so they won’t do that.
- Cateye and Exposure have a similar sensing function available in a USB rechargeable rear-light. Theirs too will get brighter when you slow down for a junction.
- Garmin has developed a rear light which includes a radar to warn the rider by way of a handlebar mounted display of a vehicle approaching from the rear. The light itself, when paired with a Garmin computer also adjusts its brightness depending on the available light.
It is worth bearing in mind that only bicycles are allowed to show a flashing red light to the rear, so it is a great differentiator for drivers eyes in difficult conditions; they won’t mistake you for something faster. So it makes sense always to show a flashing rear light even if you have one with a solid beam as well. The combination also makes it easier for the driver to pinpoint your position.
COST
Cost of bicycle lights Assembly
Bike Light Assembly Service near NM City: Bike lights in our test range from $25 to $150.
It’s surprisingly easy and really cheap. I did mine for around $60. If you ride at night, this will make your bicycle more safe and better looking. If you are into photography like us here at Stimulight the Night. Your bike will become the ultimate light painting tool.
What to look for when buying bike lights
When it comes to choosing the right bike lights, your visibility on the road is essential, but durability, size, ease of fitting and removing, and battery replacement are also important.
Here are a few other things to consider:
- USB rechargeable batteries eliminate the need to charge or replace removable batteries. They generally have a shorter battery life, but lights are easier to remove and charge regularly.
- Bike lights with multiple LEDs are usually brightest, but a single LED can still be very bright if it has a good reflector.
- Check the light is clearly visible from the side or at an angle.
- Ensure that the light mounting brackets fit your bike.
- If batteries are required they should be easily obtainable ones
See and be seen
The more visible you are, the safer you’ll be on the road. As a general rule:
- check your lights regularly. If they’re looking dim, it’s time to replace or recharge
- carry a backup set of lights
- wear light-colored or reflective clothing (or a reflective strip or vest)
- mount your lights at handlebar height, so you’re more visible.
Lights too bright
High-powered LED lights are great if you’re riding on an unlit path, however, their bright beam can blind other riders and drivers. If you want to use a high-powered light for riding on lit roads, ensure it’s pointed at the ground a few metres in front of the front wheel. Another option is to mount a second light that’s less bright to switch to when riding on a lit road or track.
Bike lights and the law
When you ride your bicycle at night or in low-visibility conditions, such as fog or heavy rain, the NM City Road Rules (the basis for state and territory laws) require that you have:
- a white light at the front
- a red light at rear
- a red rear reflector.
The lights, whether steady or flashing, must be visible for at least 200m. Ideally, they should also be visible 50m from the side. The red rear reflector should be able to be seen 50m from the rear when light is projected onto it by a vehicle’s headlight at low beam.
Don’t worry, you won’t need to test these things yourself; pretty much all bike lights on the market have this level of visibility.
FREQUENTLY ASKED QUESTIONS
Where should I put my bike lights?
With the more technical consideration out of the way, it is time to look at the practical matter of where the lights should actually go to have a maximum impact. Of course, this will depend on your unique bike but, in general, you’ll want a rear-facing light on your bike’s seat post and a front light situated in the middle of your handlebars. In addition, many saddlebags, backpacks, pannier bags and pannier racks have loops for attaching rear lights, take advantage of this feature and attach another flasher for maximum visibility.
How many lights do I need?
Regulations vary from place to place but you’ll be off to a good start if you have at least the following:
- A prominent front handlebar light, emitting white light.
- A rear light that emits red light, positioned between 35 cm and 150 cm from the ground.
- A red, rear reflector positioned between 23 cm and 90 cm from the ground.
- An amber reflector on each pedal, positioned so that one is visible to the front and rear of the bike.
Keep in mind this is the really the minimum you need to meet regulations and you’d do well to add in a few extras to maximize your safety.
Do I need to use lights during the day?
Glad you asked! The answer is yes. Despite the misguided belief that most accidents occur at night; it has actually been reported that eight out of ten cycling accidents occur while the sun is high in the sky. A recent study from Denmark concluded that the number one thing cyclists can do to keep themselves safe is be sure always to use lights during the day.
Is there such a thing as too much light?
According to regulations in most places – no. But there is a fine line between making yourself highly visible and creating a hazard by blinding other road users with your dazzling light display. In the same way that you wouldn’t cruise around town with your car lights going full beam, you don’t need to illuminate the night sky with your bike lights. The majority of lights have a variety of modes, so be sure to familiarize yourself with the setting and select something appropriate to the lighting condition you’re riding in.
Should I buy rechargeable lights?
Most of the bike lights you’ll find on the market today are conveniently outfitted with a USB interface for recharging. This is super handy and means that you can charge up your bike lights on your computer while you work or plug them into the wall the night before a ride. Rechargeable lights are handy and better for the environment, so there’s really no reason to opt for anything else.
How are the lights attached to the bicycles?
The mini LED bike lights are attached using a small elastic band that wraps around the handle bars or the frame or the carrier.
What is the delivery time for the bicycle lights?
The default delivery time is 30 days. If requested, it may be possible to shorten this time to one to two weeks. To request a shorter delivery time,
CALL US FOR:
- Bike Light Assembly Service Near NM City
- Bike Brake Light Flasher
- Bike Back Light Modified
- Tail Light For Cycle
- Bike Back Light Price
- Bike Brake Light Price
- Led Tail Lights For Bikes
- Motorcycle Tail Light
- Bike Tail Light With Indicator Near NM City
- Cycle Light
- Bike Led Lights Price
- Bike Led Light Fitting
- Led Tail Lights For Bikes
- Bike Brake Light Price
- Bike Back Light Modified
- Bike Back Light Price
- Led Fog Light For Bike Near NM City
Service Area
- Coralville Bike Light Assembly near me
- Hills Bike Light Assembly near me
- NM City Bike Light Assembly near me
- Johnson County Bike Light Assembly near me
- Kalona Bike Light Assembly near me
- Lone Tree Bike Light Assembly near me
- North Liberty Bike Light Assembly near me
- Oxford Bike Light Assembly near me
- Riverside Bike Light Assembly near me
- Solon Bike Light Assembly near me
- Swisher Bike Light Assembly near me
- Tiffin Bike Light Assembly near me
- University Heights Bike Light Assembly near me
- West Branch Bike Light Assembly near me
- West Liberty Bike Light Assembly near me
BEST BIKE LIGHT ASSEMBLY SERVICE IN ALBUQUERQUE NM IA
MOBILE MECHANICS REPAIR ALBUQUERQUE NM
REQUEST MORE INFORMATION. CONTACT US NOW!
Contact Details
Mobile Mechanic Service Albuquerque
Best Mobile Mechanic & Mobile Auto Truck Repair in NM City NM
CALL: (505) 485-1736 MOBILE MECHANIC 1
CALL: (319) 359-6136 MOBILE MECHANIC 2
CALL: (319) 471-4590 TOWING & ROADSIDE ASSISTANCE
OPEN 7 days 24 Hours
SERVICE AREA: NM City
ABOUT US
Mobile Mechanic NM City: Since 2018 MOBILE MECHANICS REPAIR ALBUQUERQUE NM has been providing reliable mobile repair services to NM City and surrounding areas. Our mechanics cover a 75 mile radius around NM City and are capable of handling any vehicle problems you may have with your truck, RV, or car. We provide mobile mechanic services 24/7 and we’re just a call away from getting you going again.
Onsite Automobile Mechanic NM City: With our traveling mechanic service, we will come to your aid and rescue. We can help and get you and your car back on the road. Mobile Auto Repair, We Bring the shop to you. Onsite car and automobile 911 repair service. Your Car’s local emergency services on the go near Albuquerque, NM.
#mobilemechanicNMCity
#mobileautorepairNMCity
#mobiletruckrepairNMCity
#onsiteautorepairNMCity
#roadsideassistanceNMCity
#24hourautorepairNMCity
#24hourtruckrepairNMCity
CALL US FOR
- 24 Hour Auto Repair
- 24 Hour RV Repair
- 24 Hour Truck Repair
- Auto Repair Shop
- Auto Repair Shops and Mechanics
- Batteries
- Car Repair
- Car Repair and Maintenance
- Car Service
- Emergency Auto Services
- Flat Tire Repairs
- Jumpstarts
- Mechanic
- Mobile Mechanic for Cars
- Mobile Mechanic for RVs
- Mobile Mechanic for Trucks
- Mobile Repair
- Mobile Welding
- On Site Auto Repair
- On Site Brake Repair
- Radiators
- Roadside Assistance
- RV Mobile Mechanic
- Shocks & Struts
- Starters & Alternators
- Tow Truck
- Towing
- Truck Repair
- Your Mechanic
SERVICE AREA
74 Cities within 30 miles of Albuquerque, NM
Ainsworth, IA | Amana, IA | Atalissa, IA | Atkins, IA |Bennett, IA |Blairstown, IA |Cedar Rapids, IA | Center Junction, IA |Clarence, IA | Columbus City, IA | Columbus Junction, IA | Conesville, IA | Conroy, IA | Coralville, IA | Crawfordsville, IA | Ely, IA | Fairfax, IA | Fruitland, IA | Grandview, IA | Harper, IA | Hiawatha, IA | Hills, IA | Homestead, IA | Kalona, IA | Keota, IA | Letts, IA | Lisbon, IA | Lone Tree, IA | Lowden, IA | Marengo, IA | Marion, IA | Martelle, IA | Mechanicsville, IA | Middle Amana, IA | Morley, IA | Moscow, IA | Mount Vernon, IA | Muscatine, IA | New Boston, IL | Newhall, IA | Nichols, IA | North English, IA | North Liberty, IA | Norway, IA | Olin, IA | Ollie, IA | Oxford, IA | Oxford Junction, IA | Palo, IA | Parnell, IA | Richland, IA | Riverside, IA | Robins, IA | Shellsburg, IA | Solon, IA | South Amana, IA | South English, IA | Springville, IA | Stanwood, IA | Swisher, IA | Tiffin, IA | Tipton, IA | Van Horne, IA | Walford, IA | Wapello, IA | Washington, IA | Watkins, IA | Wellman, IA | West Branch, IA | West Chester, IA | West Liberty, IA | Williamsburg, IA | Wilton, IA | Wyoming, IA
Near Zip Codes: 52244 – Albuquerque, NM | 52242 – Albuquerque, NM | 52245 – Albuquerque, NM | 52243 – Albuquerque, NM | 52246 – Albuquerque, NM | 52235 – Hills, IA | 52241 – Coralville, IA | 52240 – Albuquerque, NM | 52340 – Tiffin, IA | 52317 – North Liberty, IA | 52327 – Riverside, IA | 52333 – Solon, IA | 52755 – Lone Tree, IA | 52247 – Kalona, IA | 52358 – West Branch, IA
VEHICLES SERVICED
Cummins Mobile Mechanic | Freightliner Mobile Mechanic |International Mobile Mechanic |Peterbilt Mobile Mechanic| Cascadia Mobile Mechanic |Western Star Mobile Mechanic |Heavy Duty Mobile Mechanic |Semi-Trailer Mobile Mechanic | Semi-Trailer Mobile Mechanic |Mack Mobile Mechanic | Kenworth Mobile Mechanic |Acura Mechanic | Audi Mechanic | BMW Mechanic | Buick Mechanic | Cadillac Mechanic | Chevrolet | Chrysler Mechanic | Daewoo Mechanic | Dodge Mechanic | Eagle Mechanic | Fiat Mechanic | FordMechanic | GMC Mechanic | Geo Mechanic | Honda Mechanic | Hummer Mechanic | Hyundai Mechanic | Infiniti Mechanic | Isuzu Mechanic | Jaguar Mechanic | Jeep Mechanic | Kia Mechanic | Land Rover Mechanic | Lexus Mechanic | NM City Mechanic | Mazda Mechanic | Mercedes Benz Mechanic | MercuryMechanic | Mini Mechanic | Mitsubishi Mechanic | NissanMechanic | Oldsmobile Mechanic | Plymouth Mechanic | Pontiac Mechanic | Porsche Mechanic | SaabMechanic | Saturn Mechanic | Scion Mechanic | Smart | Subaru Mechanic | Suzuki | Toyota Mechanic | Volkswagen Mechanic | Volvo Mechanic
SERVICES
Mobile 30/60/90/120 Mile Services | Mobile Mechanic Ac / Heat Repair | Mobile Air Conditioning Repair & Service | Air Filter Repair Replacement | Mobile Mechanic Alternator Repair & Replacement | Antilock Braking System (Abs) Repair | Auto Maintenance | Axle Repair & Replacement | Battery Check And Replacement | Mobile Mechanic Belt Repair & Replacement | Bicycle Repair | Bike Repair | Boat Repair | Mobile Mechanic Brake Repair | Catalytic Converter Repair | Chassis & Suspension Repair | Check Engine Light Diagnostics & Repair | Clutch Repair & Replacement | Clutch, Gearbox And Shaft Repair | Compressor Repair & Replacement | Computer Diagnostic | Cooling System Repair And Replacement | Diagnosis | Diesel Repair | Differential Diagnosis | Differential Rebuild & Service | Dmv Certified Vehicle Inspection & Repairs | Dot Inspections | Mobile Mechanic Drivability Diagnostics & Repair | Driveline Repair & Maintenance | Driveshaft & U-Joint Repair |Mobile Mechanic Electric Window Repair | Electrical System Diagnostics & Repair | Emergency Auto Repair | Emergency Gas Delivery | Emission Testing | Mobile Mechanic Engine & Components Repair Replacement | Engine Management System Check | Engine Performance Check |Engine Repair | Engine Replacement |Mobile Mechanic Engine Swap | Evaporator Repair & Replacement | Exhaust Manifold Repair | Exhaust Repair & Replacement | Factory Scheduled Maintenance | Mobile Mechanic Filter Replacements |Mobile Mechanic Flat Tire Changes | Mobile Mechanic Fluid Services | Flywheel Repair & Replacement | Fuel Delivery | Fuel Injection Or Fuel Filter Repair | Fuel Pump Repair | Fuel System Repair & Maintenance | Gaskets, Belts, Hoses Repair Replacement | Mobile Mechanic Headlight Repair Replacement | Heating & Cooling System Diagnostics | Heating And Air Conditioning Repair | Ignition And Fuel Injection System | Jump Start |Mobile Light Repair & Bulb Replacements | Lockout Services | Maintenance Inspections | Mirrors And Accessories Replacement | Mobile Auto Repair | Mobile Mechanic | Mobile Truck Repair | Moped Repair | Muffler Repair & Replacement | Mobile Oil Change | Out Of Gas Help | Power Accessory Repair | Power Antenna Repair | Mobile Mechanic Power Lock Repair | Mobile Power Steering Repair | Power Window Repair | Mobile Mechanic Pre-Purchase Inspection | Mobile Mechanic Preventative Maintenance | Radiator Repair & Replacement | Mobile Radiator Repair Replacement | Refrigerant Replacement | Roadside Assistance | Rv Repair | Safety & Emissions Inspections | Mobile Mechanic Semi Truck Repair | Serpentine Belt Repair | Mobile Shocks & Struts Repair | Starter/ Solenoids Repair Replacement | State Emission Inspections & Repairs | Steering System Repair | Suspension – Shocks And Struts Repair Replacement | Mobile Mechanic Taillight Repair | Timing Belts Repair Replacement | Mobile Mechanic Tire Air Pressure Checks | Mobile Tire Balancing | Mobile Mechanic Tire Installations | Mobile Mechanic Tire Replacement | Tire Rotation | Toolbox Transportation | Mobile Transmission Fluid Service | Transmission Flush | Transmission Repair & Service | Truck Maintenance | Tune Ups | Mobile Used Car Inspection | Vehicle Inspection | Water Pump Repair & Replacement | Wheel Alignment | Winching Service |Mobile Windshield Wiper Blades | Mobile Windshield Wiper Repair
BEST TOWING, MOBILE MECHANIC, TOWING AND ROADSIDE ASSISTANCE , MOBILE MECHANICS REPAIR COMPANIES IN IOWA
ALBUQUERQUE NM TOWING & ROADSIDE ASSISTANCE (319) 471-4590 roadsideassistanceiowacity.org
MOBILE MECHANICS OF ALBUQUERQUE NM (319) 359-6136 mobileautotruckrepairiowacity.org
TOWING SERVICES OF ALBUQUERQUE NM (319) 471-4238 towingiowacity.org
VEHICLES WE SERVICE:
Acura TL TLX NSX RDX MDX ILX RLX
Audi A4 A3 A6 A8 Q5 TT Q3 A5 R8 S6 RS S5 E-TRON
BMW i8 M5 M6 M550 M8 GRAN COUPE M240
Buick Enclave Encore LaCrosse Envision Cascada Regal
Cadillac CTS Escalade XT6 XT5 ATS CT6 CTS-V XTS XT4 CT5
Chevrolet Camaro Corvette Cruze Spark Tahoe malibu Colorado Traverse Suburban Impala Eqinox Blazer EV
Volt Sonic
Chrysler 300 Voyager Pacifica
Dodge Challenger Durango Journey Charger Grand Caravan
Fiat 500 500c 500x Spider
Ford Fiesta Fusion Taurus
GMC Yukon Sierra 1500 Acadia Terrain Canyon Yukon XL Savana Sierra 2500
Honda Civic Fit CR-V Accord HR-V Odyssey Insight Pilot Passport Ridgeline
Hyundai Tuscon Elantra Kona Santa Fe Accent Sonata Veloster Venue NMXO Palisade Ioniq Elantra
Infiniti Q50 QX80 QX50 QX60 Q60 QX30 Q70 Q70L M Q45 Q40
Jaguar XE XF XJ F-TYPE I-PACE E-PACE F-PACE
Jeep Wrangler Grand Cheroke Compass Renegade Gladiator
Kia Sportage Sorento Rio Optima Stinger Sedona Telluride Soul Forte K900 Cadenza EV
Land Rover Range Rover Defender Discovery Velar
Lexus IS ES GS GS F LS UX NX HYBRID RC LC UX 250 350
Lincoln Aviator MKC MKZ Navigator Continental MKT Corsair MKZ Hybrid
Mazda CX-5 Mazda3 Mazda6 MX-5 Miata CX-3 CX-30 CX-9 RF
Mercedes-Benz A-Class C-Class CLS E-Class CLA CLS
Mini Cooper Countryman Clubman
Mitsubishi Outlander Mirage Eclipse Galant Lancer Diamante Evolution Ralliart G4 VRX Olympic
Nissan GT-R LEAF Frontier Sentra Altima Pathfinder Maxima Murano Kicks Versa Rogue Titan NV200 Armada Versa Note Titan NV Cargo
Porsche 911 Cayenne Panamera Marcan Taycan 718 Cayman Boxster Turismo
Scion Yaris Corrolla XB FR-S TC XA XD IQ
Subaru BRZ Crosstrek Forester WRX Legacy Impreza Outback Ascent STI
Tesla Model 3 s x y
Toyota Corolla RAV4 C-HR Camry Land Cruiser Yaris Prius 86 Supra Highlander Tacoma Tundra Prius-C
4runner Sienna Mirai Avalon Sequoia
Volkswagen Golf Passat E-Golg Tiguan Beetle Jetta Arteon
Volvo XC90 XC60 S60 XC40 V60 V90 S90